Examples of GECs
This page explains how to complete some basic General Error Corrections in KFS. Your department or school may have policies or procedures that pertain to processing the GEC and should be followed if applicable.
Contents
Simple Examples
Adding Additional FAU
The GEC can be used to add additional Full Account Unit (FAU) information to an entry, such as project codes and sub-account numbers.
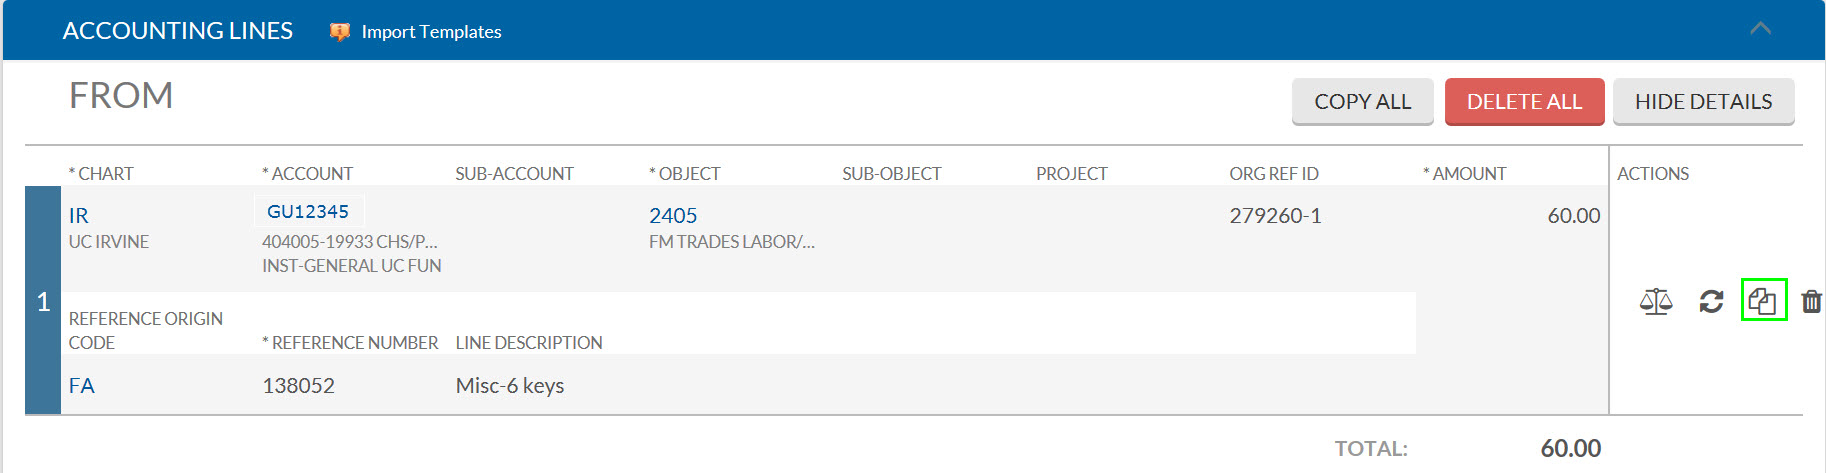
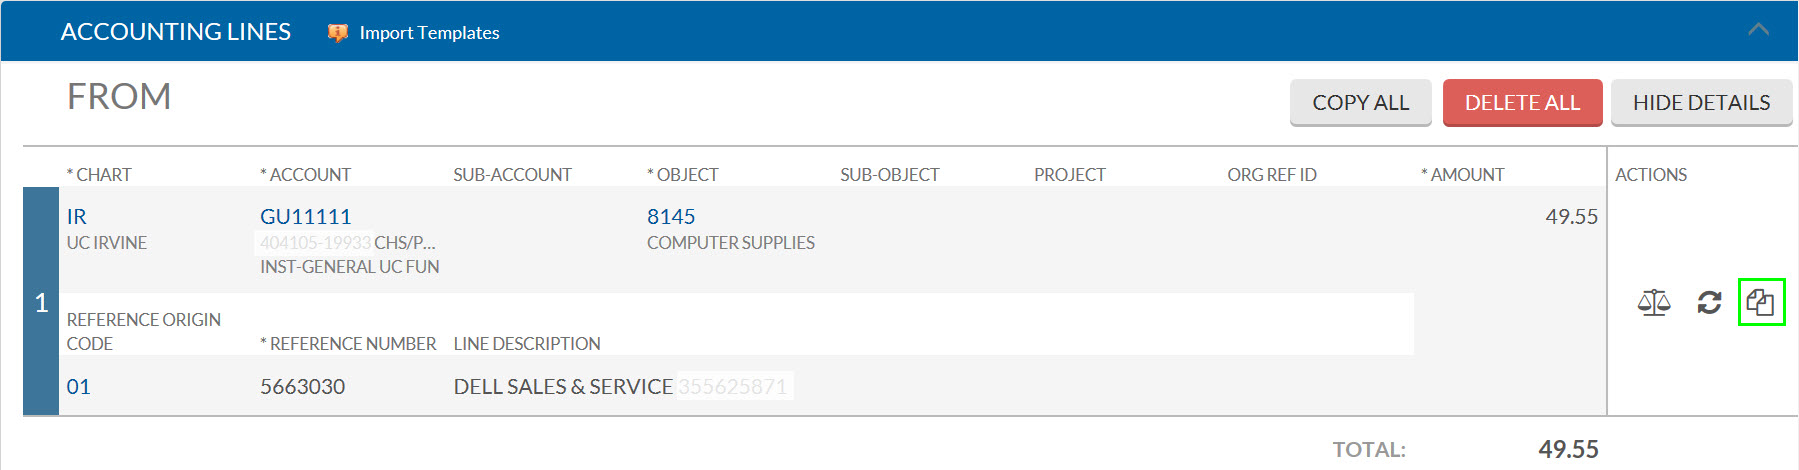
Once the entry is imported to the From section, select the copy-down button.
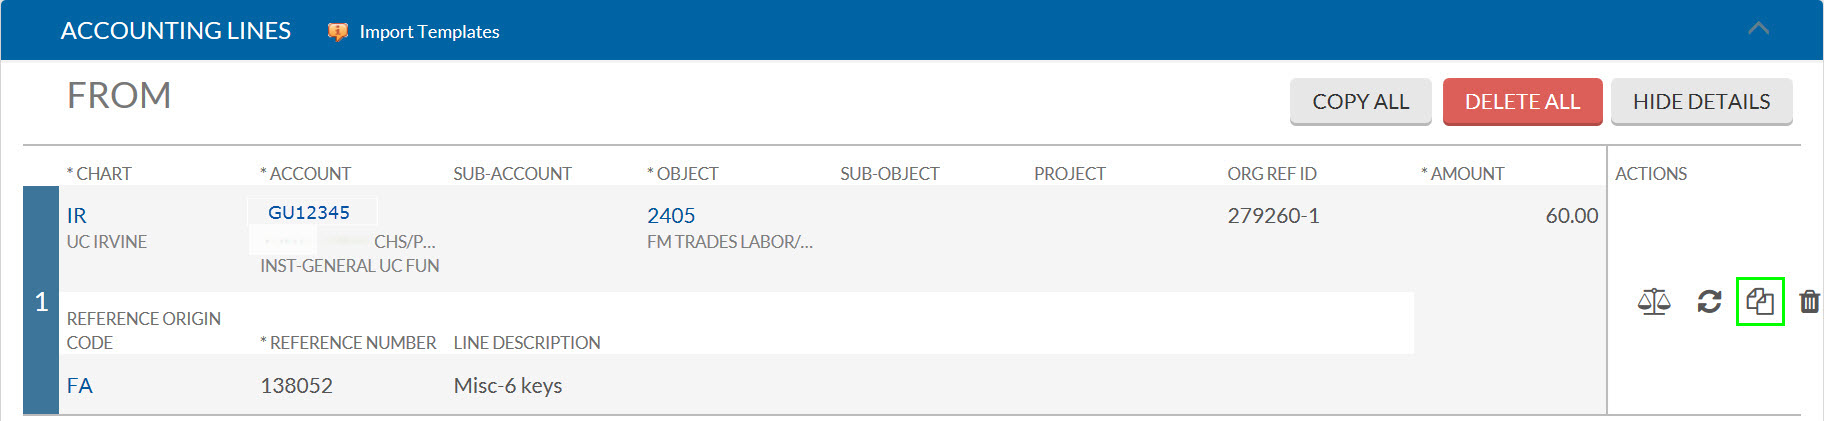
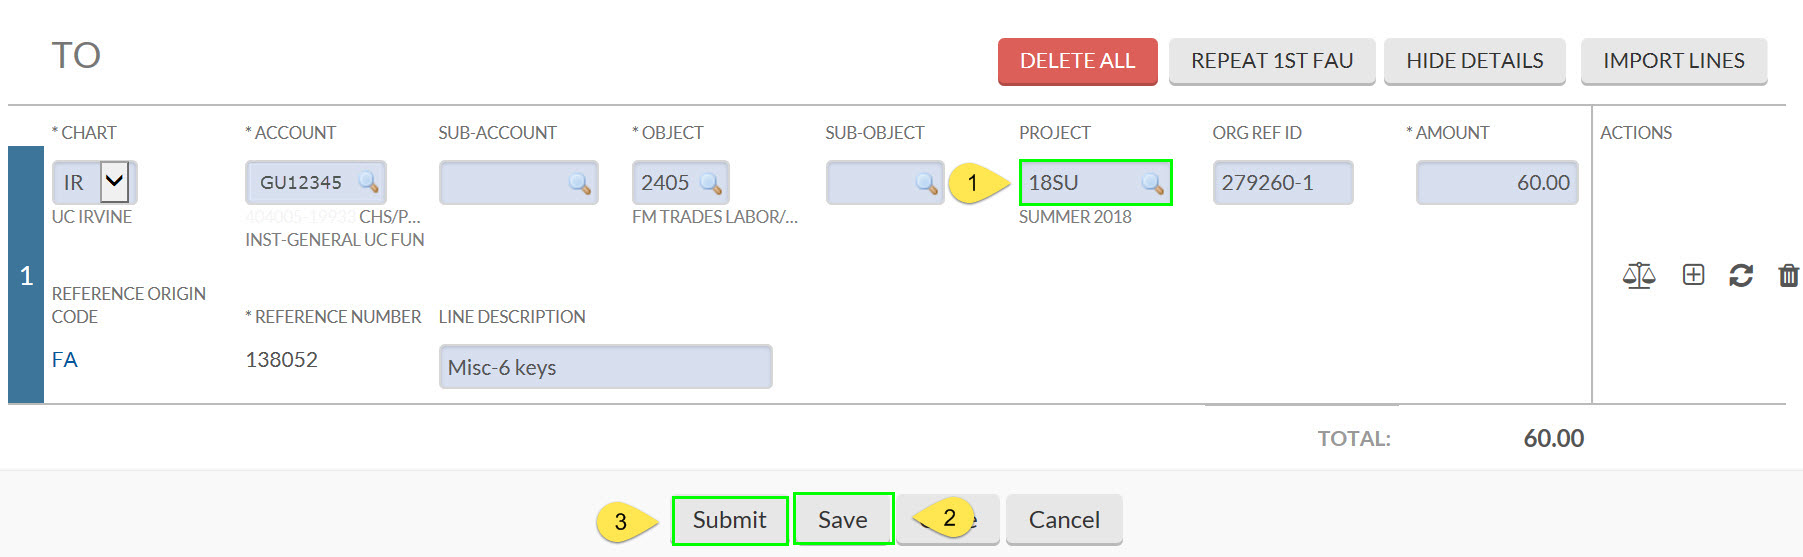
Enter the additional FAU information, save, and submit the eDoc.
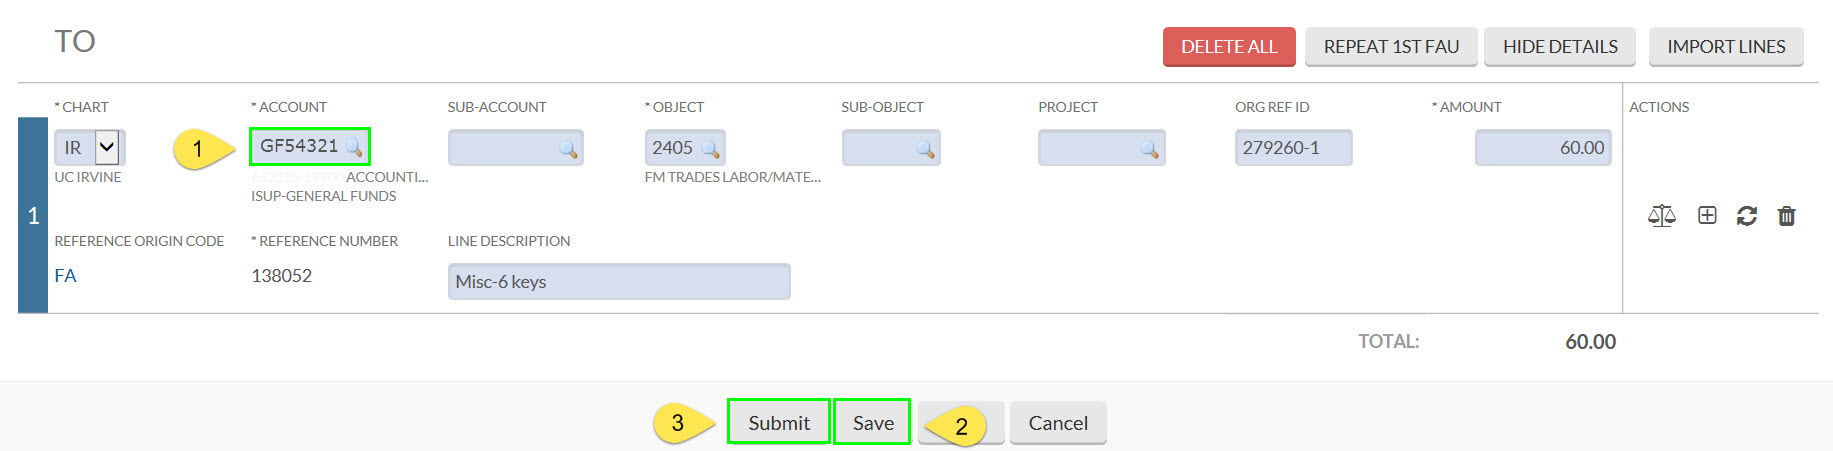
Correcting an Expense Entry
Once the entry is imported to the From section, Select the copy-down button.
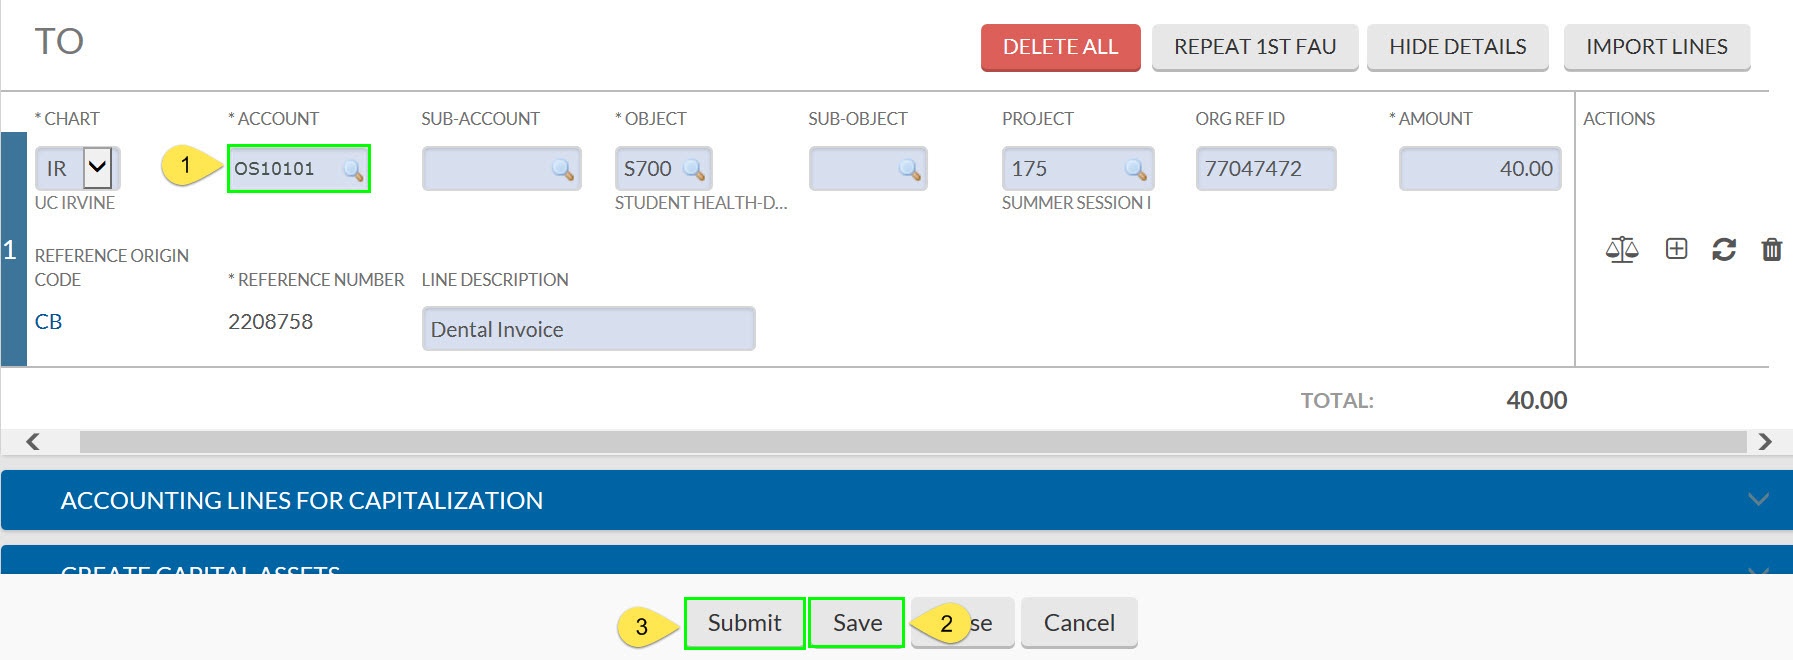
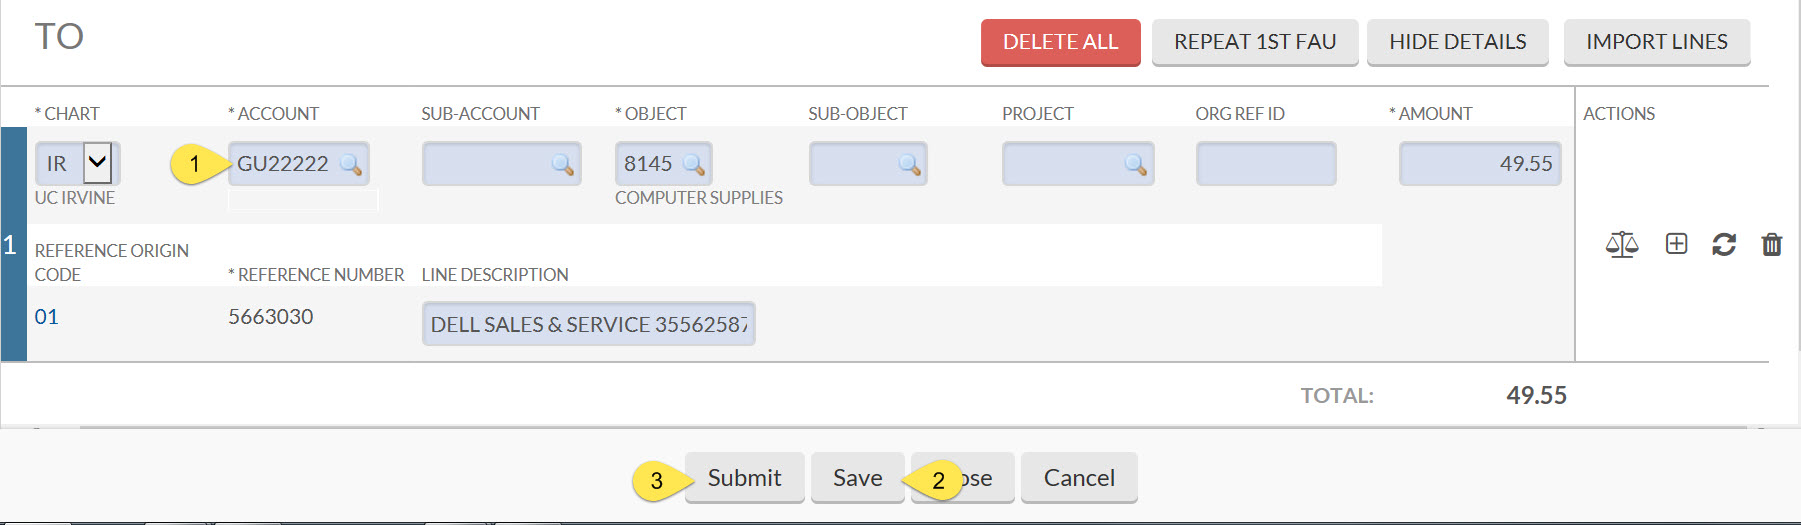
In the To section, enter the correct account number into the account number field. Then save and submit the eDoc.
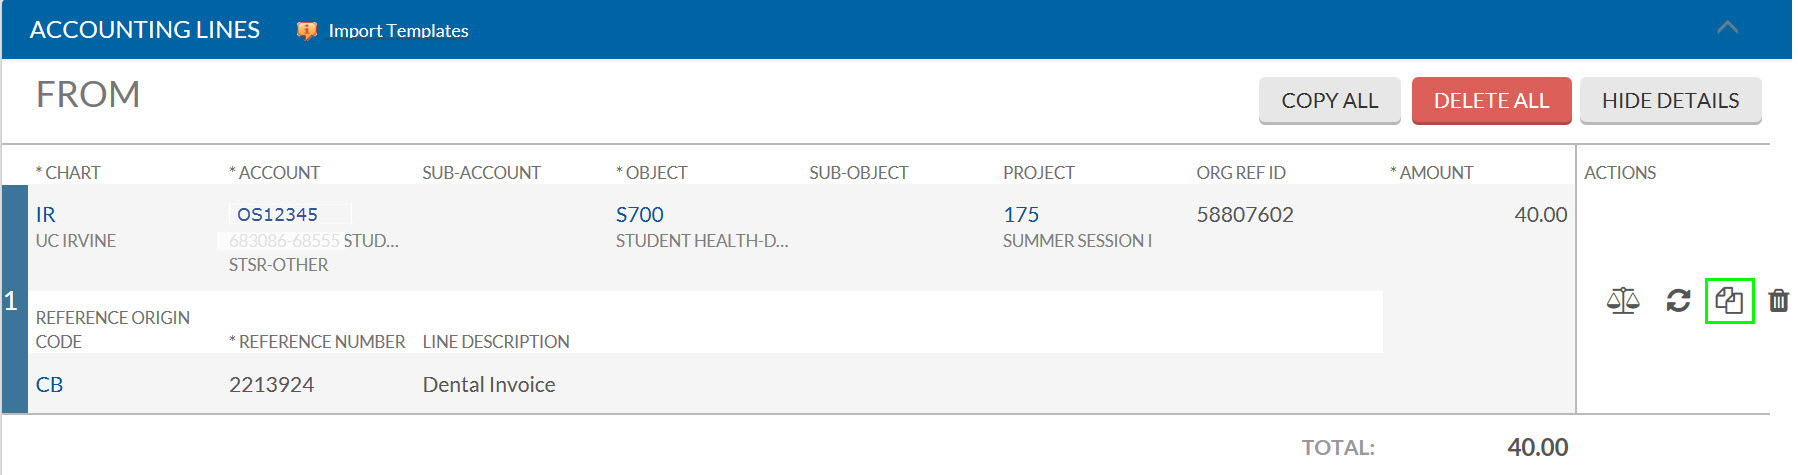
Correcting an Income Entry
When importing an income entry, ensure that the credit and income object code (object type IN or IC) is selected.

Select the copy-down button.
In the To Section, enter the correct account number into the account number field. Then save and submit the eDoc.
Correcting a Partial Amount of an Entry
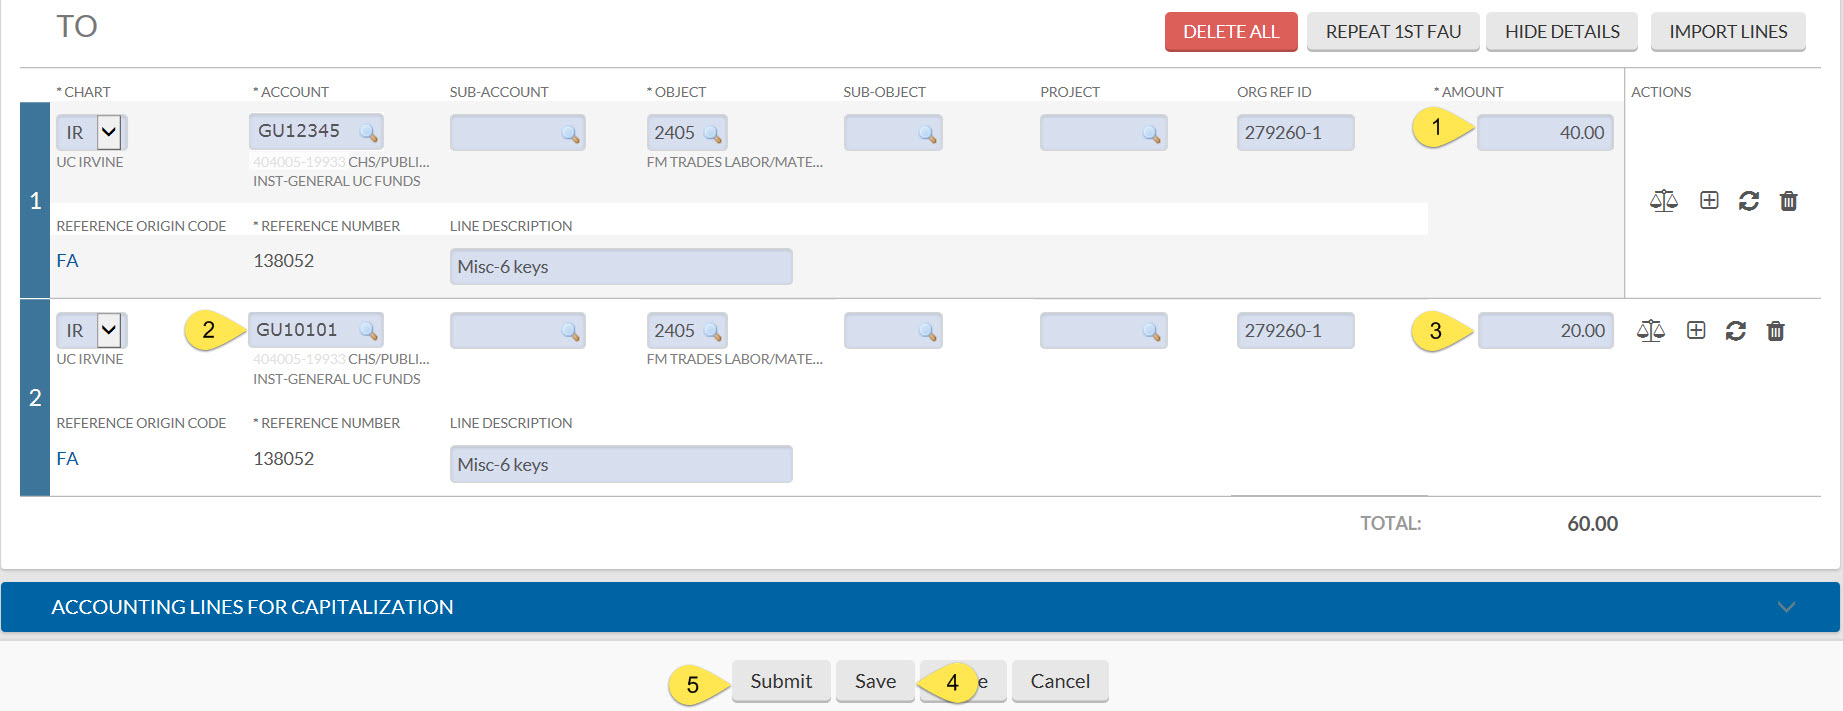
If a portion of the amount charged to an account should have been charged to a different account, a GEC can be used to correct the entry. In this example, $60.00 was charged to GU12345. Only $40.00 should have been charged to GU12345, and the remaining $20.00 should have been charged to GU10101. Import the entry that needs to be corrected. Then select the copy-down button.
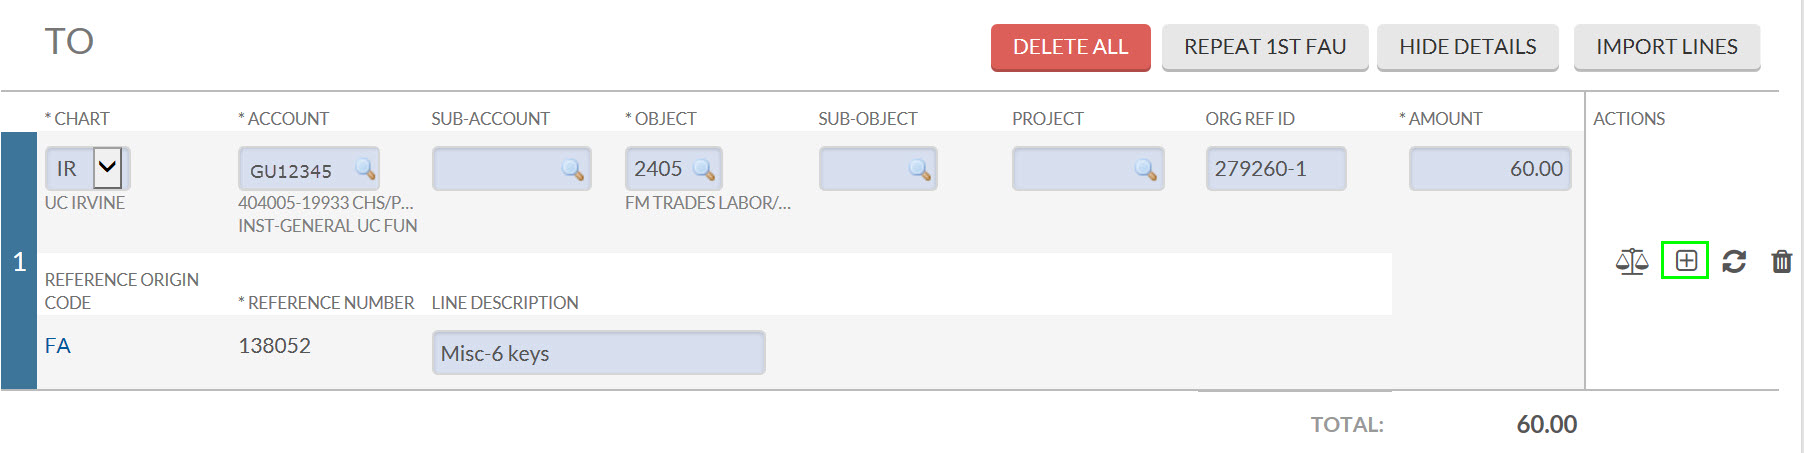
Select the add button in the To Section. This will split the charge into two equal amounts.
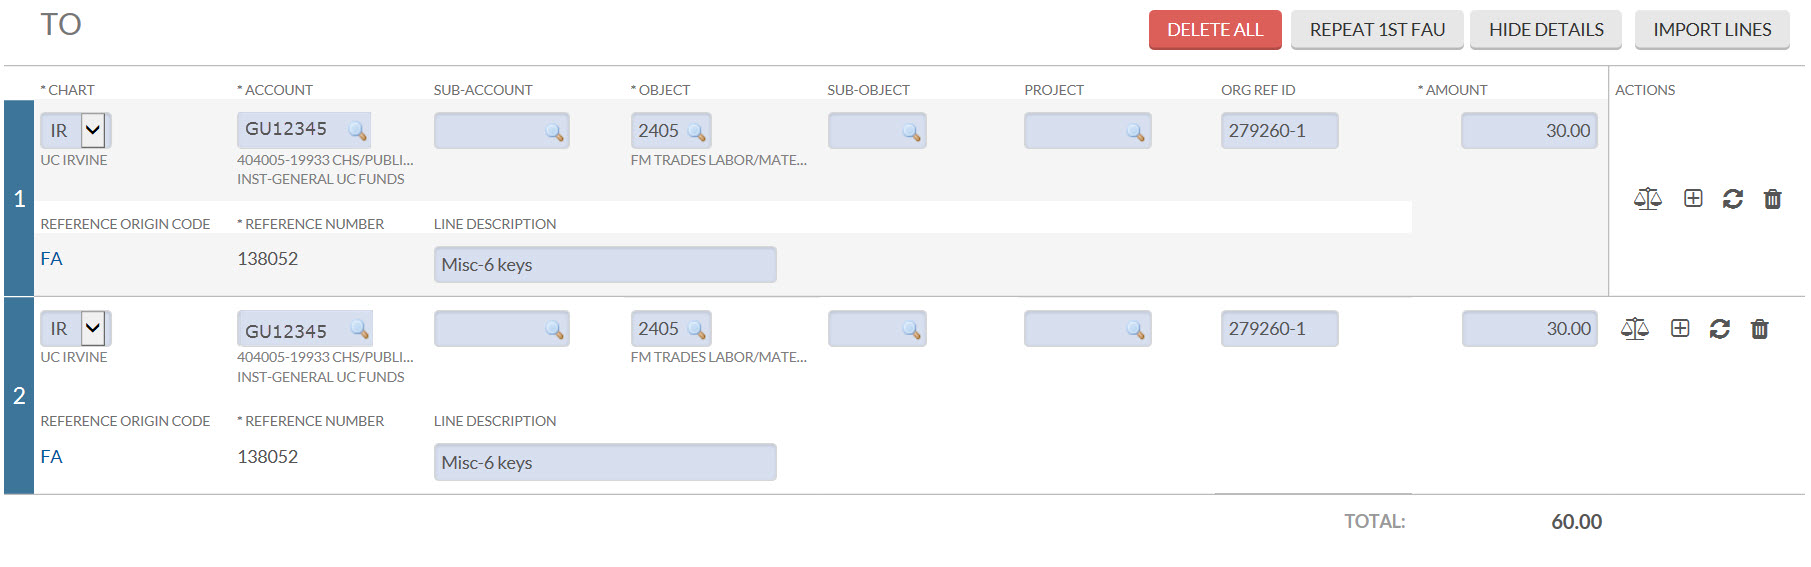
Change the amount of line one to the amount that should have been charged to the account that was incorrectly charged the full amount. In this example, GU12345 was originally charged $60.00 but should have been charged $40.00. The amount of $40.00 is entered into the amount field. Change the account number and amount of line number two. In this example, GU10101 should have been charged $20.00.
Correcting an Entry That has Already Been Imported into Another GEC
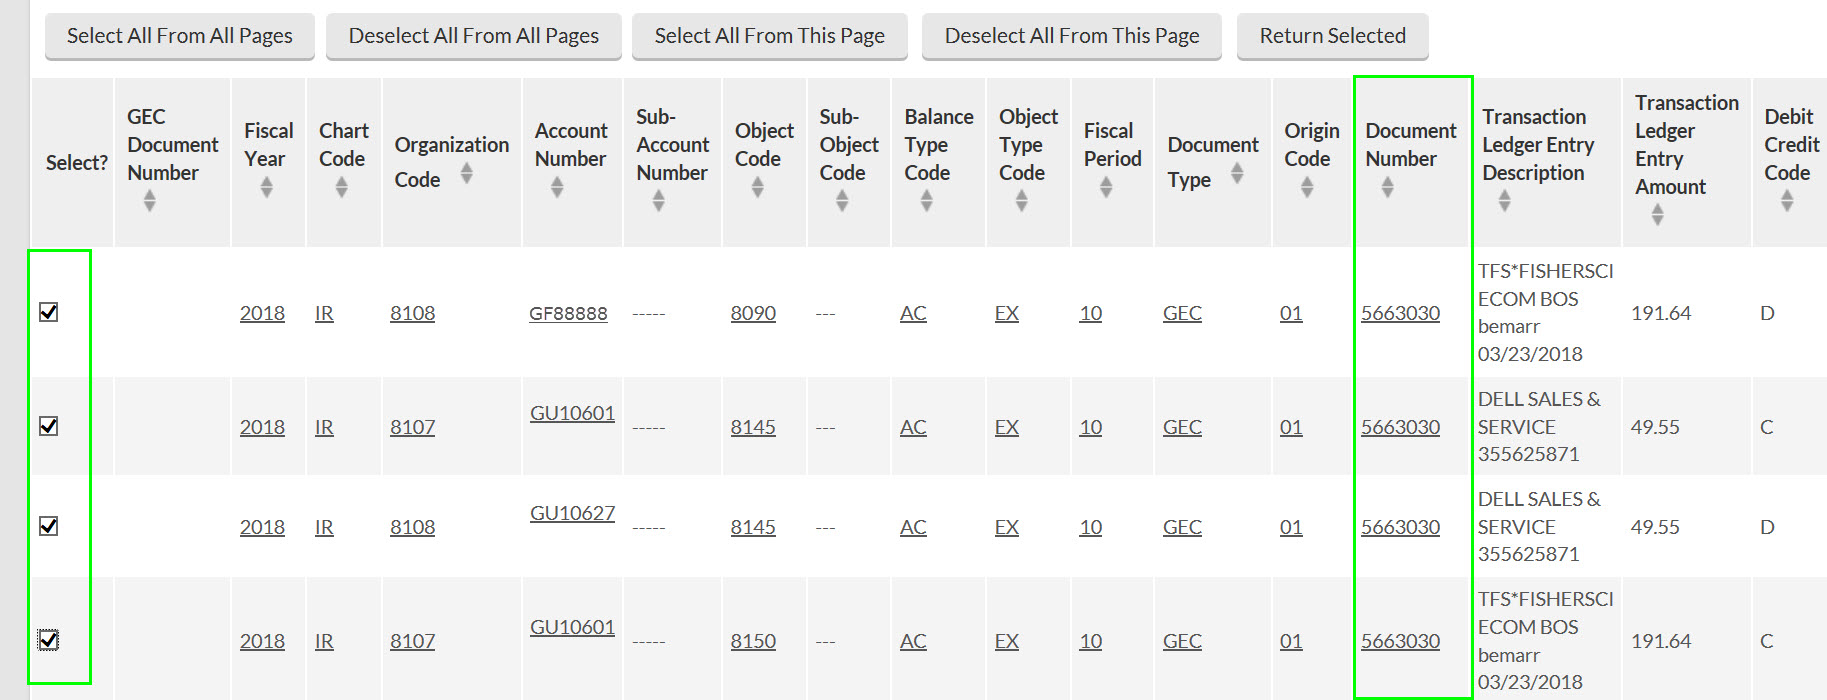
When importing an entry that has already been corrected with a GEC, the entry will not be selectable. In this example, the Charge of $49.55 was corrected using GEC document number 5663030.
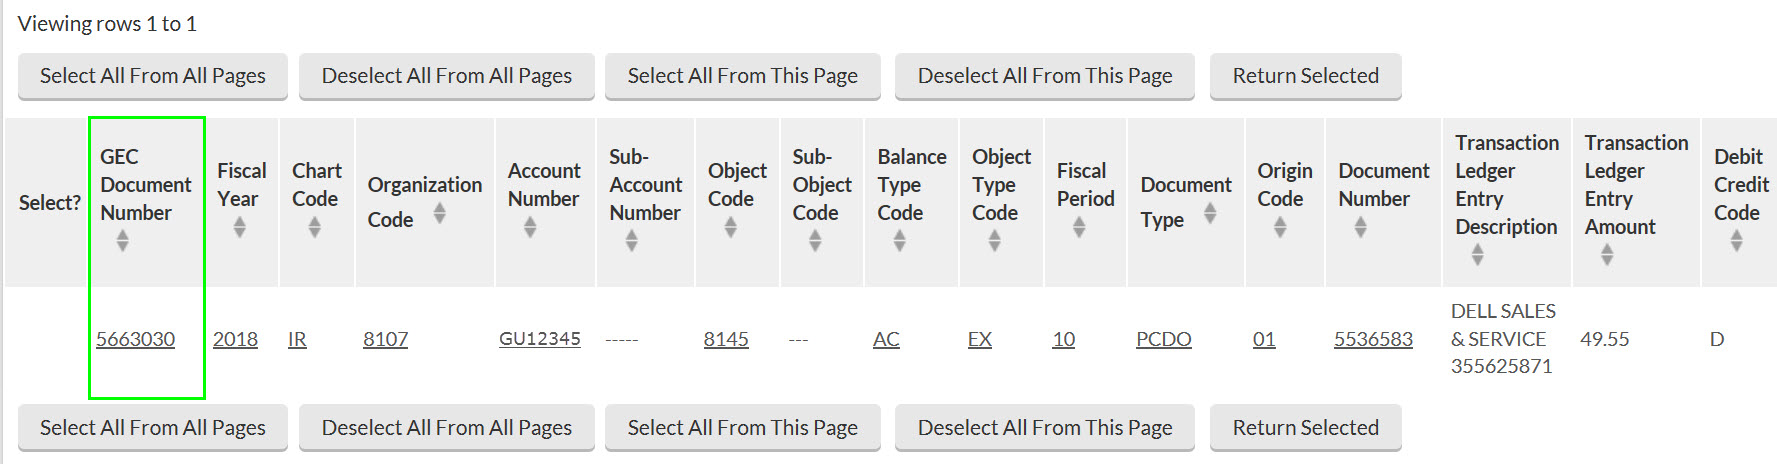
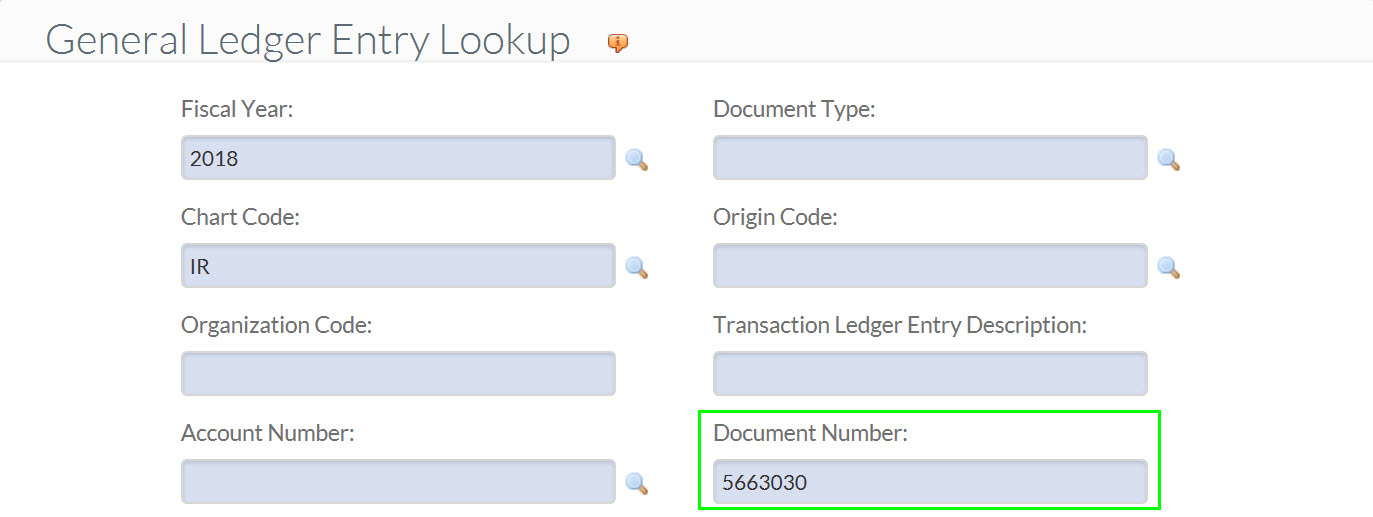
Since the original charge cannot be selected, the GEC must be selected to import into the new GEC.
When importing entries that have been corrected using a GEC it’s important to look at the Debit Credit Code column. To correct an actual expense, the entry showing a debit in the Debit Credit Code column should be chosen as this is the actual expense.
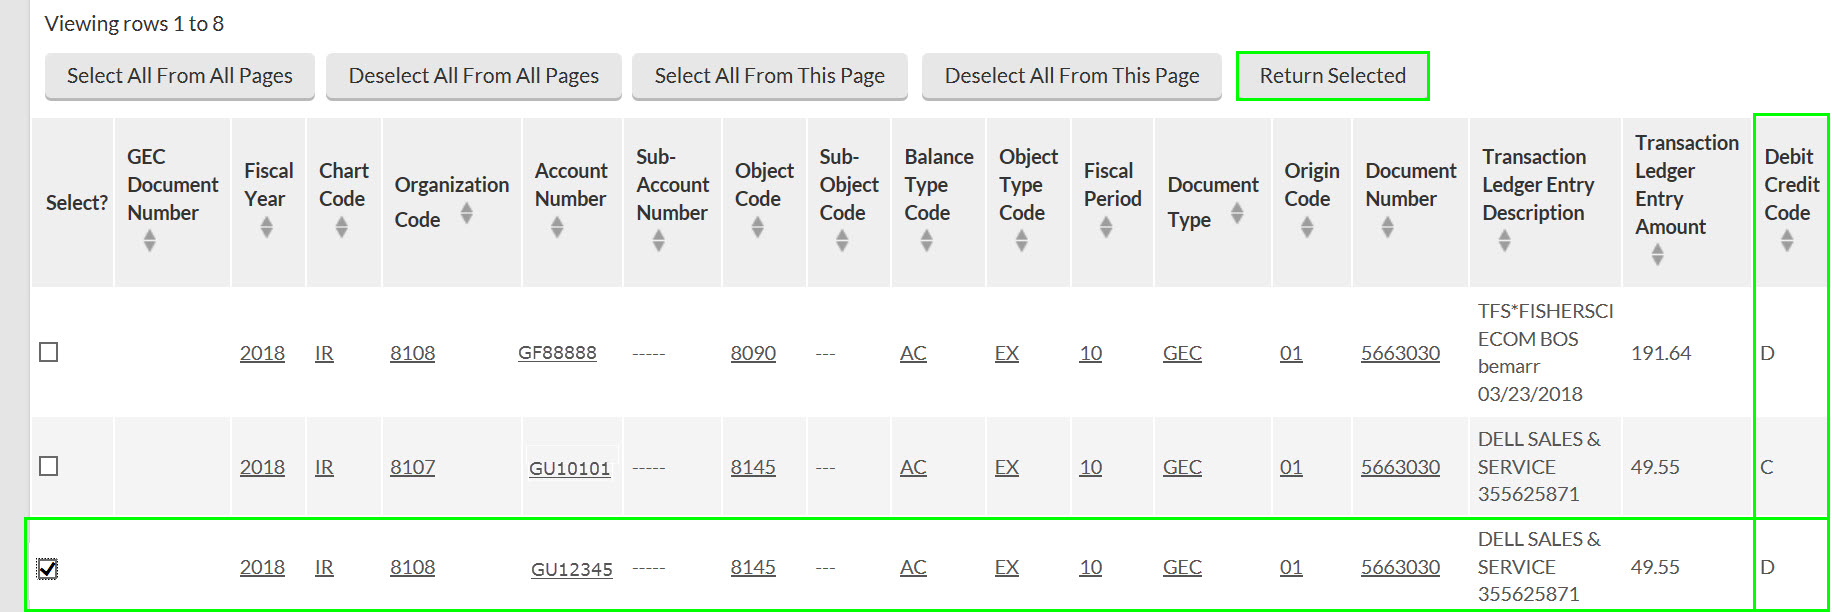
Select the copy-down button.
Change the Account Number field to the correct account number. Then save and submit the eDoc.
Reversing a GEC
If a GEC is processed in error, it can be reversed. To reverse a GEC, import all of the entries created by the GEC into the From section.
Save and submit the new GEC. The TO section should be left blank. This is called a “One-Sided GEC.” Importing entries into the From section only will reverse the first GEC.

Instructions for processing a GEC to correct use tax and processing a GEC with an equipment object code can be found on the KFS Purchasing Training Guides and Resources page.
If a GEC is performed on a PALCard transaction, the user must go into the original PALCard/PCDO document and update the Notes and Attachments section of the PCDO with the GEC document number and review date.